Android ARCore Sample
Recently I wanted to understand how to enable AR on Android. And the obvious solution was to use ARCore. They have a seemingly good documentation with visual explanations, and plenty of samples on Github.
However unlike Apple, who are wrapping everything into their own interfaces, which arguably makes learning curve more gradual, Google decided to expose all the low level details of interacting with ARCore and let you work straight with OpenGL from the day one. To demonstrate it in a sample project, they’re creating a rendering framework, which interacts with GLSurfaceView. It makes learning curve steeper but at the same time it gives more flexibility and creates a good opportunity to learn how rendering works which makes it even more fun!
Here we will try to understand the parts of the most basic hello_ar_kotlin sample they’re building, and how their rendering framework works.
Sample Project Structure
Let’s define a mental structure of the main project components.
It all starts with HelloArActivity and its main view which pretty much just holds a GLSurfaceView. It configures the ARCore.Session and hooks it to its lifecycle.
Next we have a SampleRender framework which defines the necessary abstractions and primitives for rendering. It uses the surface view to display the rendering results and handle GLSurfaceView.Renderer drawing requests. When surface view is configured with a renderer, it starts a background GL Thread where all rendering needs to happen.
And finally we have a HelloArRenderer. It implements SampleRender.Renderer requirements (which is basically an abstraction over GLSurfaceView.Renderer) and is delegated to handle the actual rendering logic. Under the hood it connects to a session to get updates, delegates rendering of the background, planes and objects, and applies lighting, which we will discuss soon.
Basically
HelloArRenderersays what to draw, andSampleRenderknows how to draw it.
 high level diagram of hello_ar_kotlin sample components
SampleRender
Now let’s look at SampleRender and what it consists of.
BackgroundRenderer is responsible for rendering camera feed as the background image. It applies background shaders and renders depth heat-map if depth API is supported by the device. Another thing is it sets up the occlusion shader for virtual objects, so that they don’t overlap the real world objects while being behind them.
PlaneRenderer visualizes detected AR planes, renders grid overlays, and applies plane shaders.
Both of them are managed by HelloArRenderer.
One notable feature of the sample project that HelloArRenderer is responsible for - is keeping track of ARCore.PointCloud. In this project they don’t play any significant role, however they demonstrate how ARCore understands the environment and represent the features it found in the real world. In the sample project they’re displayed as small glowing dots, and they can be potentially used to create more advanced AR experience.
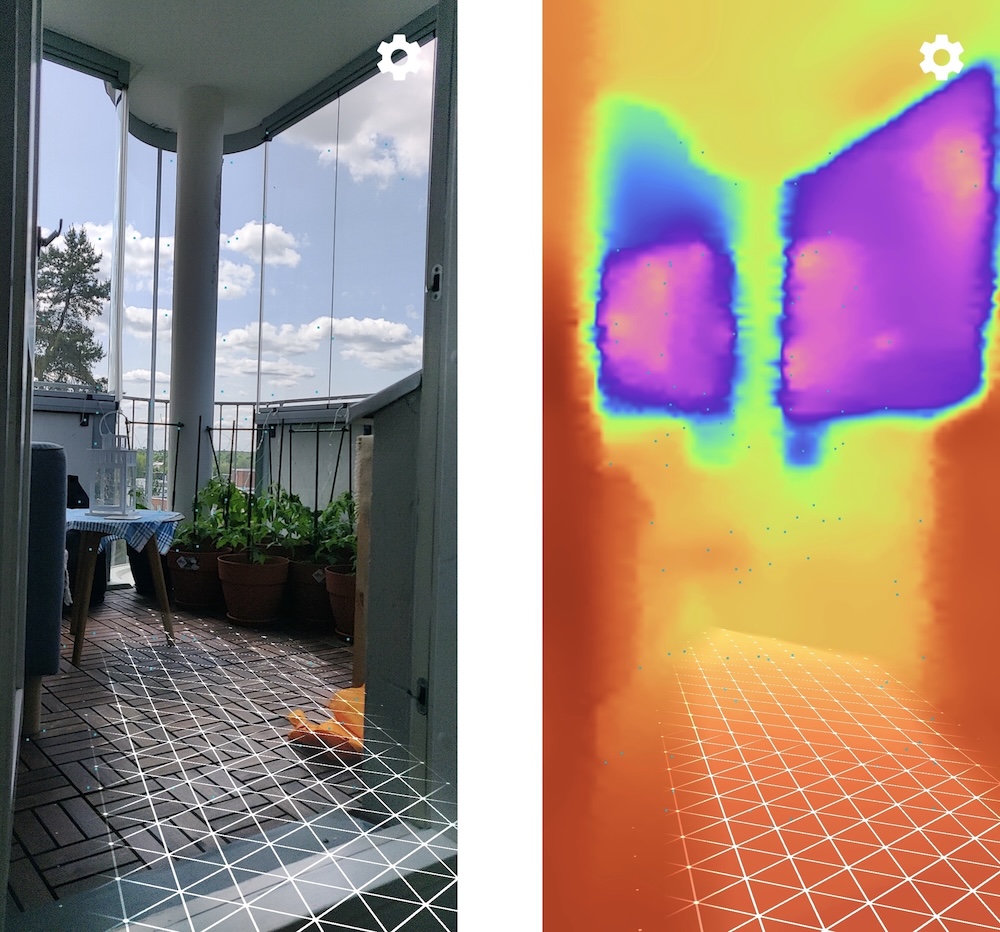 camera frame vs frame depth heat-map, both with plane grid and point cloud
SpecularCubemapFilter processes environmental lighting for realistic rendering. It filters the environment cubemap provided by ARCore, generates mipmaps for different roughness levels, and supplies filtered cubemap to shaders for lighting calculations. It is used to give virtual objects more immersive look by applying real-world light reflection.
You can think of a cubemap as a cube (with camera in the center) unfolded into a flat 6-square-images texture. And the reason it creates a mipmap (a set of blurred textures of the environment cubemap) is to simulate reflections at a different surface roughness. For clear and shiny surfaces a higher-resolution texture is used and for rougher surfaces the lower-resolution and blurrier one is used. The approach is called physically based rendering (PBR).
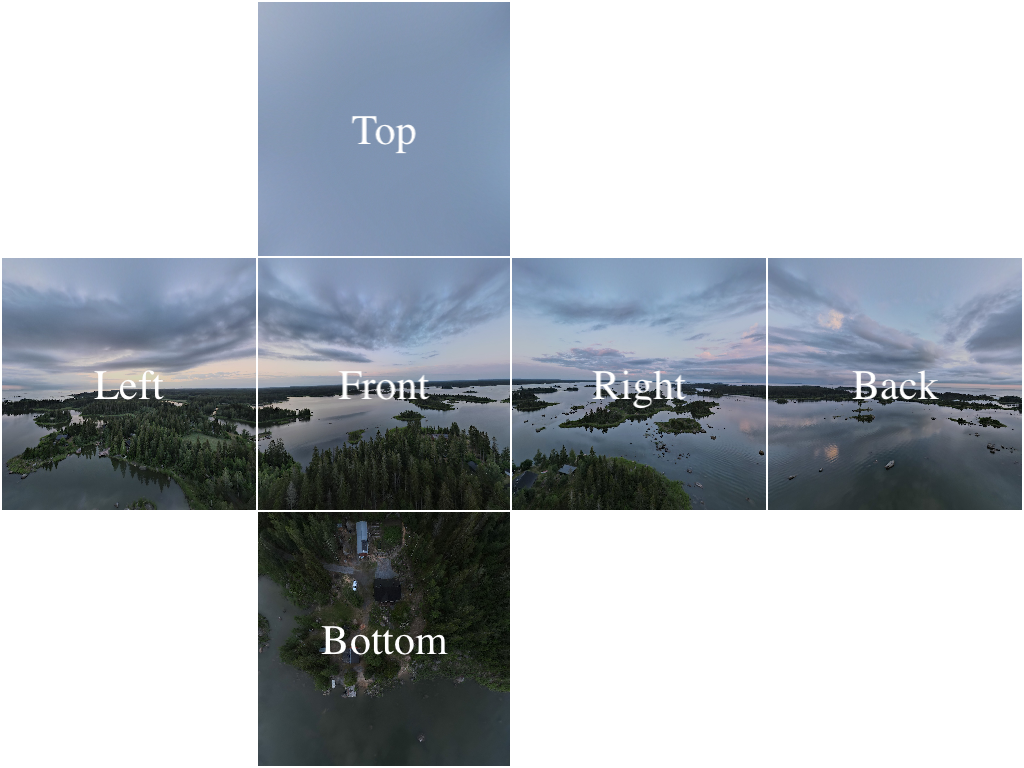 360˚ aerial view cubemap following the OpenGL faces alignment convention
Another PBR approach is used in HelloArRenderer, but to simulate diffuse (soft and ambient) reflections, and it’s called Spherical Harmonics (SH).
They reference a Filament engine to share more about the math behind it, and it’s quite crazy. In the sample project, both cubemap filter and spherical harmonics coefficients are updated on every frame according to light estimates we’re getting from the ARCore.LightEstimate data.
Now it’s time to look at the primitives.
Mesh is a structured GPU-ready representation of a 3D model, built from the raw data (obj assets) by parsing it (still on CPU) into VertexBuffer and IndexBuffer that the GPU can later use.
VertexBuffer is a list of vertices, which contain position, normal, UV and potentially other attributes. However it doesn’t have the information on how to connect those vertices.
IndexBuffer is a list of integer indices into a vertex buffer. It’s an optimization technique that allows us to reuse the same vertices multiple times.
Imagine that we want to build two adjacent triangles, sharing two vertices. One way we can do it, is by creating six vertices in vertex buffer - {v0, v1, v2} for one triangle, and {v3, v4, v5} for another one. However we can see that v4 is similar to v0 and v3 is similar to v2, which means we can be duplicating all the data they store like position, normal, UV, etc.
To improve this, we can place only four vertices {v0, v1, v2, v3} in the vertex buffer and use an index buffer to specify how to connect them through their indices in the vertex buffer - {0, 1, 2} for one triangle, and {2, 0, 3} for another one.
 VBO vs VBO + IBO
GpuBuffer is a lower-level helper class which manages raw GPU memory allocation and uploads it to GPU, without knowing what exactly data it’s holding. Both vertex and index buffers use GpuBuffer as a core. We need to upload vertices and indices to the GPU, so that further rendering pipeline operations could use that data to create framebuffers for further displaying.
Texture is basically an image that gets mapped onto a mesh, or a cubemap which is provided by ARCore, or a background taken from the camera by ARCore. It’s a buffer of pixel data (texels), optimized for image sampling in shaders. Texture is also stored in the GPU memory.
So roughly speaking a mesh is a 3D shape, and texture is a 2D skin for it.
Framebuffer is a GPU target to render into instead of doing it directly to the screen. It holds pixel data that can be displayed on a screen. It’s being used by various components to render their results into. It holds color and depth textures. Color texture is responsible for the visible result that we see, while depth texture is needed for depth testing to figure out how to place virtual objects in front of one another.
Shader acts as a wrapper over a compiled OpenGL shader program. It loads and compiles shaders from the project’s assets and provides helper functions to abstract from raw OpenGL shader code. And it’s used by pretty much all the renderers in the project.
Interactive part
And finally, when you tap on the plane - a virtual object will appear there.
When you tap on the screen ARCore will raycast into the world using Hit-Test. If it’s successful, ARCore will provide a HitResult which is used to extract an Anchor. Next the virtual object is created and “attached” to the anchor. Now we can walk around the area with our phone, yet the virtual object will stay in the same location relative to the real world, which is pretty amazing!
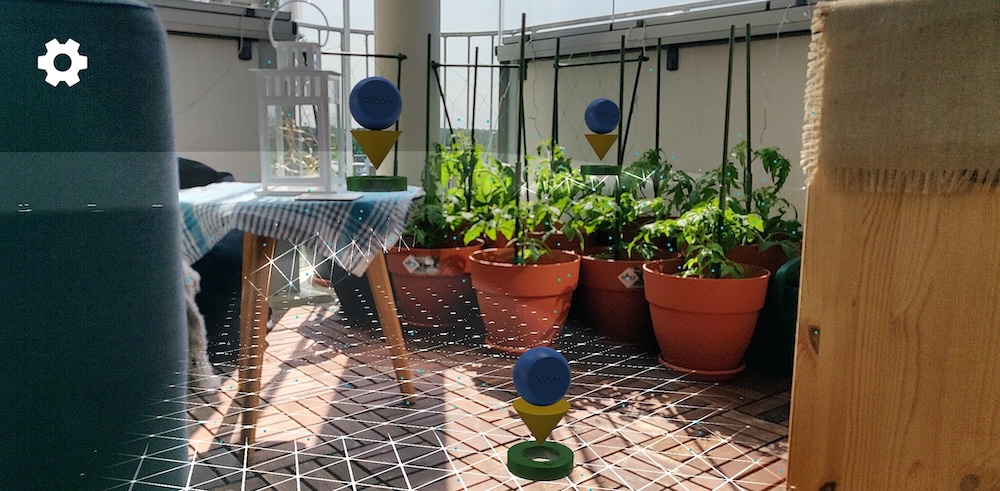 virtual objects anchored to the planes
Conclusion
Even though it takes a bit more time and effort to understand how ARCore works on Android, I feel like it gives a lot of insights into rendering part and is more fruitful in a long run when you need the freedom and don’t want to be constrained by the framework’s capabilities.
I’m mostly collecting my thoughts here and documenting my learning process, so some explanations might lack proper insights. But I sincerely hope that it can also help others to get a high level overview of the ARCore sample projects and get a better distinction where AR part ends and lower-level rendering part starts to stay focused on their journey.